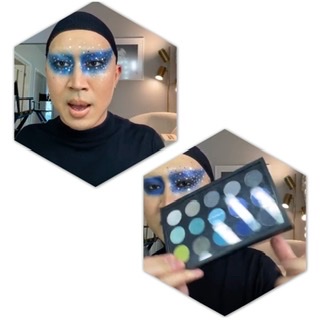
One of the things I love about MAC cosmetics is they offer some of the best masterclasses on creative makeup. As a makeup artist, it’s perfect to ignite my creative juices, advance my skills and push me out of my comfort zone. This helps me continue to learn and elevate.
Today’s class featured the extremely makeup artist, Anthony H. Nyguen who makes doing face transformations look effortless.
In this post, I’m going to share with you the steps learned to create this look. This weekend, I will re-create it on myself and share it on my IG page.
This is the completed look as seen on his Instagram page.
View this post on Instagram
Starry starry night ? tutorial comin soon #anthonyhnguyenmakeup #quarantinemakeup #macpro
Here is how you too can create the look:

Click on image to view on YouTube
- Begin by blocking your brows.
The process of completely covering your natural brows so that you can re-create and/or change the placement of your brow.
-
- Comb brown in a downward direction using a clean mascara wand.
- Apply a layer of Elmer’s Glue stick. (Be sure to smooth out once applied)
- Before the glue is set and dries….Comb brows back into their correct position with a clean mascara wand.
- Add another layer of glue. Doing this makes flattens the surface.
- Once the glue is dry, dust with powder. MAC invisible powder is suggested.
- Now coat again with another layer of glue to be sure you’ve included all those fly-a-ways and strays.
- Do another light dusting of powder once the glue is dry
- With a concealer brush #195 and Pro Longwear Paint Pot in Layin’ Low (you’ll need find the best shade or concealer to match your coloring) cover brows and blend out.
-
Now we’re ready to complete the makeup look

-
- Apply your favorite Studio Fix Foundation all over and blend. Studio Fix Fluid SPF 15 is a great choice.
- Using Pro Face Palette Contour, add definition to your cheeks and jawline.
- Create a neutral eye using the Pro Conceal And Correct shade that works for you.
- Shape the eye with eyeliner. Use Smolder Eye Kohl on both top and bottom, don’t forget the waterline. Then blend with brush #217
- With brush #252 and Chromaline Marine Ultra Gel Cream Liner apply in a tapping motion to create a blended eye effect. Lay the color right on top of the black eyeliner you applied in step 5.
- Using the same brush #252 apply Fix+ Setting Spray and add Atlantic Blue Eyeshadow over the Chromaline Marine Ultra Gel Cream Liner. This will intensify the color.
- Now use brush #224 to blend out the edges and buff out the color
- Grab brush #217 and Carbon Black Eyeshadow and apply over Smolder Eye Kohl to set the black eyeliner.
For those Starry Night Eyes
-
- Let’s set this detail with a layer of Fix+ Setting Spray.
- Using your ring finger apply Reflex Pearl Glitter around your eyes using a tapping motion. This adds a beautiful celestial effect.
- Grab the Silvers Stars Glitter and put some in a container for easy pick up and application.
- With your clear drying eyelash glue and an applicator or cotton swab, apply around, under and above the eye. Then apply the Silver Stars Glitter onto the glue before it dries.
Your eyes are ready and it’s time for the finishing touches
-
- Check your face makeup and touch up your contour as needed.
- Use your brush #150 and Blot Powder, set your makeup
- Define your lips, creating a nude lip with Cork Lip Liner (or one that works for you)..do this lightly so you are not drawing too much attention to your lips.
- Top off you lips with Primoridial Lip Glass or a nude color you prefer. Apply then lightly tap in to give that lived in look.
- With your Mineralized Skin Finish powder set your makeup.
- Spray with Fix+ Setting Spray
- Optional (use a fan for a minute to dry)
- Check out your new look.
Thank you MAC Cosmetics and the MAC Pro community.
Hope you enjoyed and will try to create Starry Night Eyes. I plan to do it this weekend.
